Dreamweaver Support Page
This article will explain how to publish your website using Dreamweaver.
1. Launch Dreamweaver from your desktop or Start menu
![]()
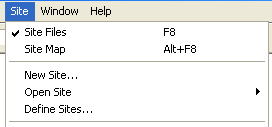
2. From the menu bar, click on "Site". Now click "Define
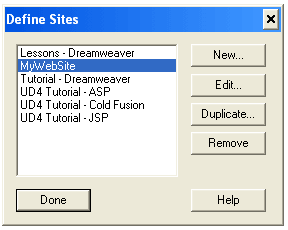
Sites..." below that.

3. Select your previously defined site from the list and then click "Edit...".
Otherwise, you can create a new site from here.

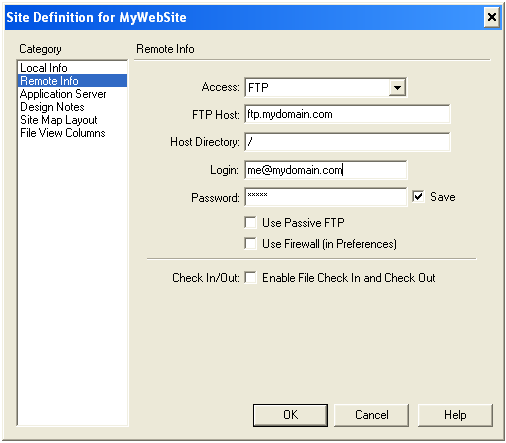
4. From the list on the left labeled "Category", click "Remote
Info".
Select "FTP" in the "Access" drop-down list.
Enter your "FTP Host". Replace mydomain.com with your domain
name.
Enter / for the "Host Directory" field.
Enter your e-mail style account login that you created in the "Login"
field.
Enter the password for your account in the "Password" field
and check the
"Save" box if you wish to have the program remember your password
for the next time.
Click "OK".
Note: If you have problems accessing the server, please
select the box labeled "Use Passive FTP".

5. Select "Site" and then "Site Files".

6. Select all your web site files in the right pane labeled "Local
Folder". Now click the blue arrow that is pointing upwards. Your
files will now be uploaded to your server.
